Creating an RSS Portal Widget in ServiceNow
Surprisingly, there is no built in Portal Widget for RSS feeds in ServiceNow. This is particuarly useful if you want to display information on the Service Portal from external sources, like the company website or an HR Services. Fortunately this is an easy one to create. In this example we will use a well known ServiceNow Blog as the source.
Querying RSS feeds
To pull content from an RSS feed into ServiceNow, we use Outbound Rest Messages. Ideally, this should be configured under System Web Services -> Outbound -> REST message, but for this purpose we’ll add to our glide script. If the target required authentication, then this would make more sense
In our personal dev instance, lets go to System Defintion -> Scripts - Background and run the script below.
 var r = new sn_ws.RESTMessageV2();
 r.setHttpMethod('GET');
 r.setEndpoint('https://developer.servicenow.com/blog.do?p=/authors/chuck-tomasi/index.xml');

 var response = r.execute();
 var responseBody = response.getBody();
 var httpStatus = response.getStatusCode();

//gs.info (responseBody)

var xmldoc = new XMLDocument(responseBody);
var title = xmldoc.getNodeText("//title");
gs.info (title);

var helper = new XMLHelper(responseBody);
var obj = helper.toObject();

//set tree level you want to loop over
var mytree = obj['channel'].item;

//put each data item on its own row with all keys
data = mytree
var keys = Object.keys(data);
keys.forEach( function(key) {
  var values = data[key]
  // do stuff with "values"
  gs.info(JSON.stringify(values))
})
This will fetch and convert the XML into objects, making it much easier to parse. It should give us an output with a list of posts from the feed. Now we’re ready to create a widget.
Create a New Portal Widget
- Open the widget editor and create a new blank widget - Instructions here
- Check off the boxes for HTML Template and Server Script
- In the top right corner, click the “hamburger menu” and enable preview and public widget
- Under HTML Template paste the code below
<div class="panel panel-primary" >
  <div class="panel-heading">
          <h2 class="h4 panel-title ng-binding">{{c.data.title}}</h2>
  </div>
      <div class="list-group">
          <div ng-repeat="item in data.items | limitTo: 5" class="list-group-item">
              <a ng-href={{item.link}} target="_blank"><h5>{{item.title }} </h5></a>
              <!-- <div class="item-content">{{ item.description }}</div> -->
          </div>
      </div>
  </div>
- Under Server Script paste the code below
(function() {
try {

 var r = new sn_ws.RESTMessageV2();
 r.setHttpMethod('GET');
 r.setEndpoint('https://developer.servicenow.com/blog.do?p=/authors/chuck-tomasi/index.xml');

 var response = r.execute();
 var responseBody = response.getBody();
 var httpStatus = response.getStatusCode();

var xmldoc = new XMLDocument(responseBody);
var title = xmldoc.getNodeText("//title");
data.title = title

var helper = new XMLHelper(responseBody);
var obj = helper.toObject();

var items = obj.channel.item;
data.items = items

}
catch(ex) {
        var message = ex.getMessage();
}
})();
Click “Save” and observe what your widget will appear like in the preview.
Add the Widget to your Portal
- From the top of the Widget editor page, click “Designer”
- Find your service portal page, usually “Service Portal index” and open it
- Drag and drop your widget from the left pane.
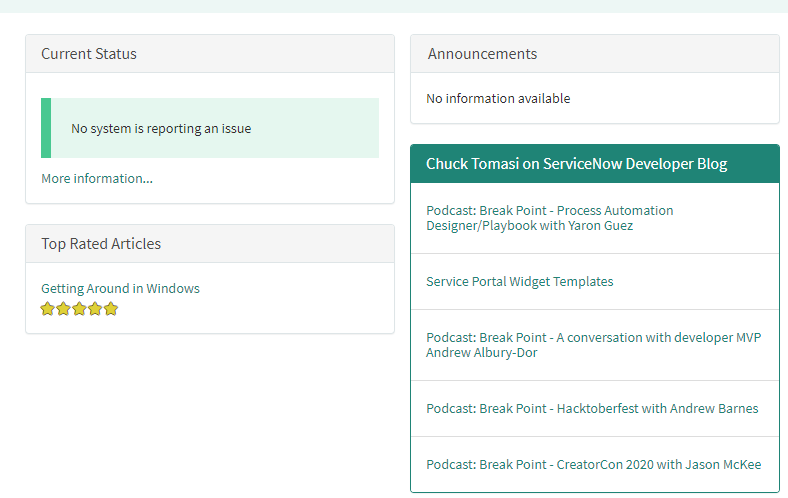
Sample result:
For more detail on Widgets, see the Tutorial: Build a custom widget.

Leave a comment