Retrieving and Displaying data on UI pages in Servicenow
Previously I posted how to display data from an external source as a portal widget. But what if you want to do this as a UI page?
Create a data source
- Navigate to System Import Sets -> Data Sources
- Click New and for type choose “Custom (Load by script)
- Title it SN_BLOG
- Use the code below to create a load script for a ServiceNow blog RSS feed.
(function loadData(import_set_table) {

    // Add your code here to insert data to import_set_table
    var r = new sn_ws.RESTMessageV2();
    r.setHttpMethod('GET');
    r.setEndpoint('https://developer.servicenow.com/blog.do?p=/authors/chuck-tomasi/index.xml');

    var response = r.execute();
    var responseBody = response.getBody();
    var httpStatus = response.getStatusCode();

    var xmldoc = new XMLDocument(responseBody);
    //var title = xmldoc.getNodeText("//title");

    var helper = new XMLHelper(responseBody);
    var obj = helper.toObject();

    var items = obj['channel'].item;

    var data = items;
    var keys = Object.keys(data);
    keys.forEach(function(key) {
		var values = data[key];
        var map = {
            u_title: values.title,
            u_pubDate: values.pubDate,
            u_link: values.link,
            u_description: values.description
        };
        import_set_table.insert(map);
    });
})(import_set_table);
Save it and load all records. Now if you navigate to “u_sn_blog.list” you should see a set of rows. If you click on the “i”, you’ll see the feed data. You can schedule this data source to import under “System Import Sets -> Scheduled Imports”.
Create a UI page
Now we’ll create a UI page that will query the latest import of the temporary table and display it.
- Navigate to System UI-> UI Pages
- Click New and title it “my_news_temp_table”
- Paste the code below into the HTML field, save and then click “try it”.
<?xml version="1.0" encoding="utf-8" ?>
<j:jelly trim="false" xmlns:j="jelly:core" xmlns:g="glide" xmlns:j2="null" xmlns:g2="null">
<g:evaluate object='true' >
//to get latest import set
var staging_table = 'u_sn_blog'
var import_set = new GlideRecord ('sys_import_set');
import_set.addQuery('table_name', staging_table);
import_set.orderByDesc('sys_created_on');
import_set.setLimit(1);
import_set.query();
// To get the first 5 entries from the current import set
while (import_set.next()) {
  // get latest import set for temp table
  //gs.print(import_set.number);
  items = new GlideRecord(staging_table);
  items.addQuery('sys_import_set.number', import_set.number);
  items.setLimit(5);
  items.query();
  };
</g:evaluate>

<div class="panel panel-default">
<table class="table table-bordered">
<tr style="background-color:#428BCA; color:#FFFFFF;">
<th>Title</th>
<th >Date</th>
<th>Description</th>
</tr>
<j:while test="${items.next()}">

<tr>
<td style="width: 60x;"><a target='_blank' href="${items.u_link}"> ${items.u_title}</a></td>
<td>${items.u_pubdate}</td>
	<td><div style="max-width: 900px; height:60px; overflow:hidden;">${items.u_description}</div></td>
</tr>
</j:while>
</table>
</div>

</j:jelly>
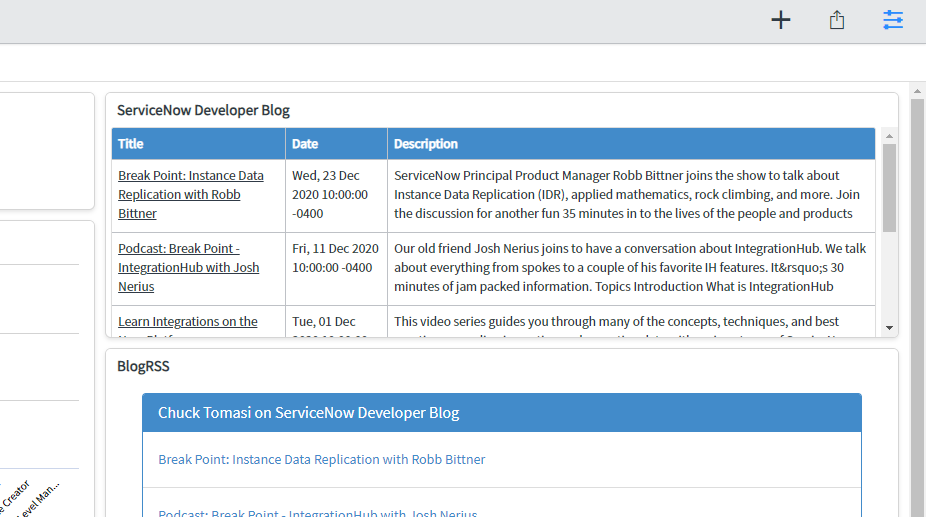
Now just add the ui page as widget. Instructions here: https://docs.servicenow.com/bundle/paris-performance-analytics-and-reporting/page/use/dashboards/task/create_widget_displays_webpage.html
Result
I’ve learned a few things on the way while doing this.

Leave a comment